It's all gone to pieces

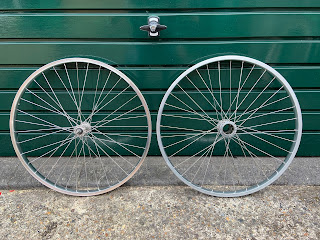
Well nearly...I've managed to strip the bike down all accept getting the handle stem tube free.  That appears to be ceased well and good. So while that is soaked with WD-40 and tinkered with daily to try to get it free I have cleaned the grubby white wall tyres and polished up the wheels.  Once dry I am very tempted to use plimsoll whitening to get them even whiter!

The Shimano hub was really stiff and grungy, so in a brave moment I have taken that apart too, let's hope I can get it all back together!

The photo of the crank and front chain ring was taken before I started to clean it all up.  All came up really well, but the chrome plating on the crank arms is peeling off.  My plan is to actually sand it off to a convenient point, make good the rust and then spray the entire crank with smooth silver Hammerite paint.  This should give an even finish and also protect the steel.

Comments

Popular posts from this blog

And the bike is done...

The last few weeks have been a waiting game, the last few items ordered online have taken their time to arrive, the last being the brake cable end stops.  So while I had everything else together, I had no way of using the brakes. Now that it's all together and the first shake down ride complete, I am very pleased with this project.  What do you think? It's been a great project to do over the past three months, i've learnt a lot: Stripping the bike down and removing the paint took longer than I had imagined You use a lot more paint that you think, in fact I would say that I could have done more coats of paint, or been better at those that I applied Finding the right bottom bracket axle, front chainring combination is hard, in fact, I am not entirely satisfied with what I ended up with, but it works The single speed conversion hub is a genius pice of kit! Cyclecross in-line brake levers are no good if you want to have a front and bac

Primmed and ready for the top coat

Spent the weekend spraying two coats of primer on the bike, I still have a tendency to either spray too quickly and end up covering the garage more than the metalwork, or, spray too slowly and end up with some runs in the paint.  That was easy to resolve with a light wet sanding, but yet to find the balance between the two. I am hoping that for the top coat I won't have this issue, I have found a paint from spray.bike  that sprays on like a powder coat, but dries like a traditional rattle can.  The results I have seen across the internet are impressive, so hoping that this helps with the final finish.  Anyway, here are the results from the primer coat:

Bike No. 2 Finished

That's it, all done.  The original plan was to do the bike up and then sell it on, but that plan has gone to the side.  It will be used by Sophie when she goes to University this September.  It was a fun project, the best bit was actually rebuilding all the components with Sophie.